Floor Planner-2D online floor planning tool.
Make a Floor plan very Simple.
Floor Planner is a 2D online floor planning tool. It is the best selling, easy to use tool for making floor plan design for Windows and Mac. This article gives you detail about this amazing tool. By using this tool, make your floor plan in the simplest and easy way. Read more to know about this software.
Details About Floor planner 2D Tool

Floor Planner is the tool that makes you easily design house floor plans. Firstly, start the Planner you will see a welcome message. After that, click the ‘Start with a New Plan’ button. And then you are ready to start designing your plan.
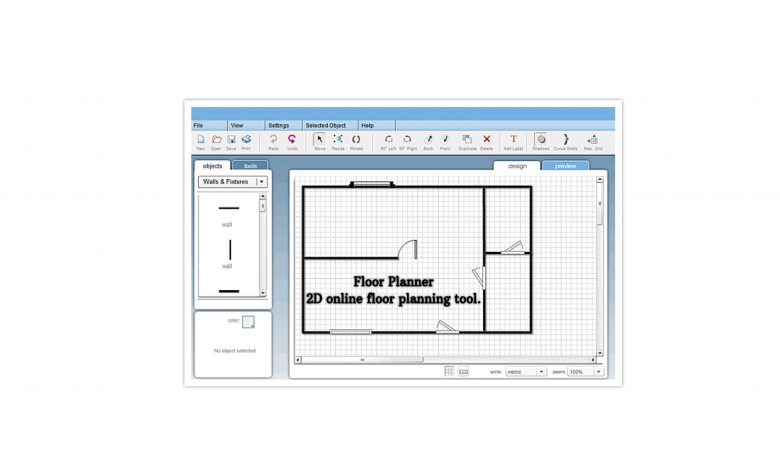
It is made up of eight main parts Menu, Toolbar, Objects Panel, Tools Panel, Grid, Properties Panel, Preview Window, and Image options. Firstly, The Menu is at the very top of the application are the menu options. This option works like a menu in any application. Just click on any menu item and a list of options appears below. Secondly, the toolbar is a row of buttons that allow you to quickly perform common actions. New Plan, Open a Plan, Save Plan, Print, Undo and Redo, Select/Move, Resize and more options are available in the toolbar.
Advertisement
Next, The Objects Panel is the option where you find the library of all the doors, walls, and other objects. It helps you use to create your floor plan. Simply click on an object select it from the panel. And then click to place it onto the grid to start creating your plan. The objects are organized into a number of categories to make it simpler and faster to find specific objects.
Few more details are
The Tools Panel is the option you will find a number of tools designed to help you in creating your plan. To select a tool click on one of the blue tool icons in the bottom half of the tool panel. The currently selected tool will appear pink. Then, the properties panel appears underneath the tools and objects panel. It shows the properties for the currently selected object. If no object is selected then the Properties Panel is blank. And the color button lets you change the color of the selected object.
The preview window can be seen by clicking on the blue preview tab at the top of the grid. It allows you to adjust settings before either printing your plan or saving your plan as an image. And the print option available at the top left of the preview window are the print options.
Advertisement
On the left of the preview window, under print options are the options for exporting as an image. You can select the format for the exported image, either Jpeg or PNG. Moreover, PNG is a higher quality format and the best choice if you plan on including your plan image in a document.PowerPoint presentation or viewing it in an image editing program.JPEG is the best choice if you plan to email your plan to someone, or put it on the web or share it with friends on a social network site like Facebook. Click Here to check that software.